
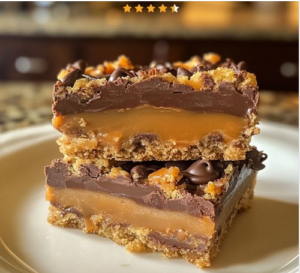
Butterfinger Caramel Crunch Bars
Indulge in the delicious combination of chocolate, caramel, and Butterfinger candy with these decadent Butterfinger Caramel Crunch Bars!
Ingredients:
- 1 ½ cups graham cracker crumbs
- ½ cup melted butter
- 1 can sweetened condensed milk
- 1 cup caramel sauce
- 1 cup chopped Butterfinger candy bars
- 1 cup chocolate chips
Instructions:
1. Preheat Your Oven: Preheat your oven to 350°F (175°C) and grease a 9×9 inch baking dish. This step ensures your bars will bake evenly without sticking to the pan.
2. Prepare the Crust: In a medium-sized bowl, mix together the graham cracker crumbs and melted butter. Once fully combined, press the mixture firmly into the bottom of the prepared baking dish, forming an even layer. This will be the deliciously crunchy base of your bars.
3. Create the Caramel Layer: In a separate bowl, stir together the sweetened condensed milk and caramel sauce until smooth. Pour this creamy caramel mixture over the graham cracker crust, spreading it out evenly.
4. Add the Crunch: Sprinkle the chopped Butterfinger candy bars evenly over the caramel layer. The Butterfinger adds a delightful crunch and peanut-buttery flavor to every bite.
5. Top with Chocolate: Evenly distribute the chocolate chips over the top of the Butterfinger layer. As the bars bake, the chocolate will melt and create a rich, gooey topping.
6. Bake to Perfection: Place the baking dish in the preheated oven and bake for 25-30 minutes, or until the edges are golden brown. The bars should be set but still slightly gooey in the center.
7. Cool and Serve: Allow the bars to cool completely in the baking dish before cutting them into squares. This helps the layers to set properly, making them easier to slice and enjoy.
Nutrition Information:
- Calories: 250
- Fat: 12g
- Carbohydrates: 35g
- Protein: 3g
Helpful Tips to Make Butterfinger Caramel Crunch Bars Even More Delightful:
1. Use Homemade Caramel Sauce: If you have the time, consider making your own caramel sauce. The rich, buttery flavor of homemade caramel can elevate these bars to a whole new level. Plus, you can control the sweetness and consistency to match your taste preferences.
2. Experiment with the Crust: For a twist on the traditional graham cracker crust, try using crushed pretzels or a mix of graham crackers and crushed Butterfinger pieces. The pretzels will add a salty crunch that pairs beautifully with the sweet caramel and chocolate layers.
3. Toast the Butterfinger Pieces: For an extra layer of flavor, lightly toast the chopped Butterfinger candy bars before adding them to the bars. This will enhance the nutty, buttery taste and add a bit of extra crunch.
4. Add a Drizzle of Chocolate: Once the bars have cooled, melt some extra chocolate chips and drizzle them over the top of the bars for a beautiful finish and an extra hit of chocolatey goodness.
5. Mix in Some Nuts: If you love a bit of extra crunch, mix some chopped pecans or almonds into the caramel layer. The nuts will add texture and complement the flavors of the Butterfinger and chocolate.
6. Layer with Peanut Butter: For peanut butter lovers, consider adding a thin layer of creamy peanut butter between the graham cracker crust and the caramel layer. This will add a rich, nutty flavor that pairs perfectly with the Butterfinger pieces.
7. Use Dark Chocolate: Swap out the milk chocolate chips for dark chocolate chips to create a richer, more intense chocolate flavor. Dark chocolate also balances the sweetness of the caramel and Butterfinger for a more sophisticated taste.
8. Chill for a Firmer Texture: If you prefer a firmer texture, refrigerate the bars for an hour after they have cooled to room temperature. This will help the caramel and chocolate layers to set more firmly, making the bars easier to slice and serve.
9. Add a Sprinkle of Sea Salt: Just before serving, sprinkle a small amount of flaky sea salt over the bars. The salt enhances the sweetness of the caramel and chocolate, creating a delightful contrast of flavors.
10. Serve with Ice Cream: For an indulgent dessert, serve these Butterfinger Caramel Crunch Bars warm with a scoop of vanilla ice cream on the side. The cold ice cream pairs wonderfully with the warm, gooey bars, making for an unforgettable treat.
40 Secrets to Achieving the Perfect Butterfinger Caramel Crunch Bars
1. Use Fresh Ingredients: Start with fresh, high-quality ingredients, especially when it comes to butter and graham crackers. Fresh ingredients make a noticeable difference in flavor.
2. Finely Crush the Graham Crackers: For a smooth crust, ensure that the graham crackers are finely crushed. Use a food processor for best results.
3. Press the Crust Firmly: Press the graham cracker crust firmly into the pan to create a solid base that holds up well when cut.
4. Line the Pan with Parchment Paper: Line your baking dish with parchment paper, leaving some overhang. This makes it easy to lift the bars out of the pan for cutting.
5. Chill the Crust: Chill the graham cracker crust for 10-15 minutes before adding the caramel layer. This helps the crust set and prevents it from becoming soggy.
6. Use High-Quality Butter: Opt for unsalted, high-quality butter to control the saltiness and enhance the buttery flavor of the crust.
7. Make Your Own Sweetened Condensed Milk: For a richer taste, try making your own sweetened condensed milk. It’s surprisingly easy and can add a deeper, fresher flavor.
8. Balance the Sweetness: If your caramel sauce is very sweet, consider adding a pinch of salt to balance the flavors.
9. Toast the Butterfinger Pieces: Lightly toasting the Butterfinger pieces intensifies their flavor and adds extra crunch.
10. Use Good Quality Chocolate Chips: Choose high-quality chocolate chips for a richer and smoother melt on top of the bars.
11. Add a Layer of Peanut Butter: Spread a thin layer of peanut butter on the crust before adding the caramel layer for an extra flavor dimension.
12. Stir Caramel Sauce Until Smooth: Ensure your caramel sauce is perfectly smooth before spreading it over the crust to avoid any lumps.
13. Use a Double Boiler for Chocolate: Melt the chocolate chips using a double boiler to prevent burning and ensure a smooth, glossy finish.
14. Mix in Extra Crunch: Add a handful of crushed pretzels or nuts into the crust mixture for added crunch and flavor.
15. Bake Until Just Set: Bake the bars until the edges are just set and golden brown. Overbaking can lead to a hard, dry texture.
16. Cool Completely Before Cutting: Allow the bars to cool completely before cutting to avoid a gooey mess and ensure clean, even slices.
17. Refrigerate for Easy Cutting: Chill the bars in the refrigerator for 30 minutes before cutting for perfectly neat squares.
18. Use a Hot Knife to Cut: Run a knife under hot water, wipe it dry, and then cut the bars. This helps to slice through the layers cleanly.
19. Store in an Airtight Container: Store the bars in an airtight container to maintain their freshness and prevent them from drying out.
20. Add a Drizzle of Caramel: For an extra touch, drizzle additional caramel sauce over the bars before serving.
21. Sprinkle with Sea Salt: A light sprinkle of flaky sea salt on top of the bars enhances the sweet and salty contrast.
22. Serve Warm: For a gooey, decadent experience, serve the bars slightly warm, with the chocolate still melty.
23. Pair with Ice Cream: Serve these bars with a scoop of vanilla ice cream for an indulgent dessert combo.
24. Use Dark Chocolate: Swap out the milk chocolate for dark chocolate chips for a richer, less sweet flavor profile.
25. Double the Caramel: Love caramel? Double the caramel sauce for an extra gooey and indulgent treat.
26. Add a Splash of Vanilla: Mix a teaspoon of vanilla extract into the caramel sauce for added depth of flavor.
27. Create a Marbled Top: Swirl the caramel and chocolate layers together with a toothpick for a beautiful marbled effect on top.
28. Add Some Spice: Sprinkle a touch of cinnamon or cayenne pepper into the graham cracker crust for a surprising kick of flavor.
29. Use Salted Butter: Using salted butter in the crust adds a slight salty contrast to the sweet caramel and chocolate.
30. Try Flavored Graham Crackers: Use flavored graham crackers, like cinnamon or chocolate, to change up the base flavor.
31. Top with Extra Butterfinger: Sprinkle additional chopped Butterfinger pieces on top of the bars after baking for more crunch and flavor.
32. Add a Nutty Layer: Mix crushed peanuts or almonds into the caramel layer for added texture and flavor.
33. Incorporate Coconut: Mix some shredded coconut into the graham cracker crust or sprinkle on top for a tropical twist.
34. Use White Chocolate: For a sweeter variation, use white chocolate chips instead of milk or dark chocolate.
35. Add a Bit of Espresso: Mix a teaspoon of espresso powder into the caramel layer to enhance the chocolate flavor.
36. Freeze Before Serving: For a summer treat, freeze the bars before serving for a refreshing, ice-cold dessert.
37. Cut into Small Bites: Cut the bars into small, bite-sized squares for easy snacking or party platters.
38. Top with Whipped Cream: Add a dollop of whipped cream on top of each bar slice for an extra indulgent treat.
39. Use a Mix of Chocolates: Combine milk, dark, and white chocolate chips for a varied and complex chocolate flavor.
40. Make Ahead: These bars are perfect for making ahead. They keep well in the fridge, and the flavors only get better with time.
These secrets will help you elevate your Butterfinger Caramel Crunch Bars to perfection, ensuring they are always a hit whenever you serve them!
40 Popular Questions & Answers Related to Butterfinger Caramel Crunch Bars:
1. What type of Butterfinger should I use? Use standard Butterfinger candy bars, chopped into small pieces for the best texture and flavor.
2. Can I use other candy bars instead of Butterfinger? Yes, you can substitute Butterfinger with other crunchy candy bars like Snickers or Twix, though the flavor will vary.
3. Can I use a different type of crust? Absolutely! You can use a pretzel crust, Oreo crust, or even a shortbread crust for a different twist.
4. How do I keep the crust from getting soggy? Chill the crust in the refrigerator for 10-15 minutes before adding the caramel layer to help it stay crisp.
5. Can I use store-bought caramel sauce? Yes, store-bought caramel sauce works fine, but homemade caramel will add a richer flavor.
6. What type of chocolate chips should I use? Milk, semi-sweet, or dark chocolate chips all work well. Choose based on your preferred sweetness level.
7. How can I make the bars firmer? Refrigerate the bars for an hour after cooling to help them set more firmly before cutting.
8. Can I add nuts to the recipe? Yes, adding chopped nuts like pecans or almonds to the caramel layer adds great texture and flavor.
9. How do I store Butterfinger Caramel Crunch Bars? Store them in an airtight container at room temperature for up to 3 days or in the refrigerator for up to a week.
10. Can I freeze these bars? Yes, these bars freeze well. Wrap them tightly in plastic wrap and freeze for up to 3 months.
11. What’s the best way to cut the bars? Use a sharp knife warmed under hot water and wiped dry to get clean cuts through the layers.
12. How can I make the bars less sweet? Use dark chocolate chips instead of milk chocolate and reduce the amount of caramel sauce slightly.
13. Can I make these bars gluten-free? Yes, simply use gluten-free graham crackers and check that all other ingredients are gluten-free.
14. What can I substitute for sweetened condensed milk? You can use coconut sweetened condensed milk for a dairy-free version, or make your own using evaporated milk and sugar.
15. Can I use caramel candies instead of sauce? Yes, melt caramel candies with a bit of cream to create a pourable sauce that works similarly.
16. How do I prevent the caramel layer from seeping into the crust? Ensure the crust is pressed firmly and chilled before adding the caramel layer to create a barrier.
17. What size pan should I use? A 9×9 inch baking dish is recommended, but an 8×8 inch pan will also work for thicker bars.
18. Can I add a layer of peanut butter? Yes, spreading a layer of peanut butter between the crust and caramel adds a delicious flavor.
19. How long should I let the bars cool before cutting? Allow the bars to cool completely, about 2 hours, for the cleanest cuts.
20. Can I use white chocolate chips? Yes, white chocolate chips add a sweet, creamy layer that contrasts nicely with the caramel.
21. Should I refrigerate the bars before serving? Refrigerating the bars can help them set better, especially in warm weather, but it’s not necessary unless you prefer a firmer texture.
22. Can I use salted butter? Yes, salted butter can be used, but you may want to reduce any additional salt in the recipe.
23. How do I prevent the chocolate chips from melting too much? Bake the bars just until the edges are golden and the chocolate is soft, but not fully melted.
24. What can I use instead of graham cracker crumbs? Crushed digestive biscuits, vanilla wafers, or even shortbread cookies work well as alternatives.
25. Can I add more Butterfinger pieces? Absolutely! Feel free to add extra Butterfinger pieces for even more crunch and flavor.
26. How do I make the bars chewier? Reduce the baking time slightly for a softer, chewier texture.
27. Can I drizzle chocolate on top after baking? Yes, drizzling melted chocolate on top after the bars have cooled adds a decorative touch and extra chocolate flavor.
28. How do I know when the bars are done baking? The edges should be golden brown and the center set but still slightly soft. They will firm up as they cool.
29. Can I add a layer of marshmallows? Yes, adding mini marshmallows on top before baking creates a gooey, s’mores-like effect.
30. What’s the best way to melt the chocolate? Melt the chocolate chips slowly in a double boiler or microwave, stirring frequently, to prevent burning.
31. Can I make these bars dairy-free? Yes, use dairy-free butter, sweetened condensed coconut milk, and dairy-free chocolate chips.
32. Should I toast the Butterfinger pieces? Toasting the Butterfinger pieces lightly enhances their flavor and adds extra crunch.
33. Can I double the recipe? Yes, double the ingredients and use a 9×13 inch pan, adjusting the baking time as needed.
34. What’s the best way to serve these bars? Serve the bars slightly warm with a scoop of vanilla ice cream for an indulgent dessert.
35. How do I add a salty-sweet flavor? Sprinkle a pinch of flaky sea salt over the bars just before serving to enhance the salty-sweet contrast.
36. Can I use homemade graham crackers? Yes, homemade graham crackers add a fresh, more flavorful crust compared to store-bought.
37. How can I make the bars more chocolatey? Increase the amount of chocolate chips or add an extra layer of melted chocolate on top.
38. Should I refrigerate the bars overnight? Refrigerating the bars overnight allows the flavors to meld and makes them easier to cut the next day.
39. Can I add a layer of fruit preserves? Yes, adding a thin layer of fruit preserves like raspberry or strawberry between the crust and caramel adds a fruity twist.
40. How do I prevent the chocolate chips from sinking? Gently press the chocolate chips into the top layer just after adding them to prevent them from sinking during baking.


